Tuesday, July 27, 2010

Healthy Wholemeal Bread

I'm not really a fan of bread.  But recently I seems to like eating wholemeal bread more.  Still many bakery's wholemeal bread isn't nice!

Nowadays I like to bake my own wholemeal bread.  It's fresh, soft and nice.  Most important, I can guarantee the ingredient used are really healthy.


Here's the ingredients needed:
100g Soft Butter
60g Sugar
2 tbsp Condensed Milk
1 tsp Salt
1 Egg
15g Instant Yeast
150g Water
70ml Fresh Milk
50g Quaker Oats
350g Bread Flour
200g Whole Meal Flour

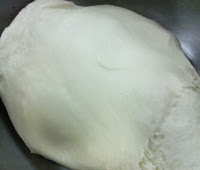
Put butter, sugar, condensed milk, fresh milk,salt, egg, yeast, water and oat in mixer bowl and use dough hook to mix it at medium speed for 5 minutes.


Add in bread flour and whole meal flour and slow beat into a smooth and elastic dough. (Optional to add raisins, nuts or sunflower seeds if like).  Cover dough and let it rest for 30 minutes till it double in size.


Divide dough into desire size (I make about 50g for round empty buns and 70g for those that I wrap with hot dogs).   After rolling dough in to desired size and shape, place it on greased baking tray for 2nd proofing to let it double in size again (DO NOT TOUCH OR MOVE THE DOUGH DURING OR AFTER 2ND PROOFING).
Make sure you leave enough space inbetween the dough.
Preheat oven after 30 minutes of 2nd proofing at 200 degree.


See after 2nd proofing, the small doughs should look nice and round.  Time to bake!!

Bake it at center rack for 10 minutes or till golden brown.


Cool your buns on wire rack before storing!
Buns taste best when it's warm....yummy....I just love eating them!!
Buns are best to be eaten within 3 days.
Good luck in baking!!

Wednesday, July 21, 2010

Steam Carrot Cake

If you asked me what is my favorite kueh kueh I would say it's carrot cake.  However those carrot cake sold outside are usually from factory and don't have much ingredients in it!

Today I'll share with you a soft and wonderful carrot cake recipe.

Ingredients:
600g Radish (Shred but do not squeeze out the juice - about 500g)
25g Mushroom (soak and dice)
25g Dried Cuttlefish Floss (soak 5 minutes and drain)
80g Dried Shrimps (soak 20 minutes, drain and dice)
150g Chinese sausage (dice)
530g Rice Flour
40g Tapioca Flour
1 tsp Alkaline Water
1500ml Water

Seasoning:
1 tbsp Sugar
2 tsp Salt
1 tbsp Pepper
1 Chicken Cube or 2 tbsp Chicken Powder
1 tsp Sesame Oil

Garnish:
Some slice shallots and dice spring onions and chilli
  • Add rice flour, tapioca flour and 700ml water in a pot and mix well.  Rest the mixture for 1 hour then sieve it and add in alkaline water.
  • Heat wok and add 2 tbsp oil and stir fry shallots till brown and remove.  Add in dried shrimps and stir fry till fragrant and then add in mushroom to mix well.  Add in cuttlefish floss and Chinese sausages and fry well.
  • Pour in the shredded radish and mix well and cook till radish becomes soft then add in 1 tbsp sugar and stir well.
  • Add in the balance seasoning and 800 ml water and  cool till boil then add in 1 tsp sesame oil and cook 1 minute.
  • Pour all the ingredients into the flour mixture in pot and stir well.
  • Place the pot on fire and cook mixture with low fire till it becomes slightly thicken (keep stirring during the process).  Pour the thicken mixture into a 10 inch grease tin and steam it for 45 minutes with high fire.
  • Cut and sprinkle dice spring onion, chilli and fried shallots on top.  Dash of sesame seeds too if you like.
  • You can also pan fry the carrot cake till slightly crispy for variation.

Sunday, July 18, 2010

Crazy over Donut!

Still remember the days whereby you need to queue up an hour just to buy some fanciful donuts?   While I find that Singaporean loved to "Q" hahahaha...I don't know why!!

To me I find that those fanciful donut with fillings or coating on the outside are too sweet!! (Maybe because I don't really have sweet tooth).

If given a choice, I still prefer the traditional type of donut..the plain one coated with castor sugar!

If  you really like to have some other taste, you can melt some coating chocolate and coat the whole donut or just the top.  You can also sprinkle rainbow rice on top of the chocolate before it's  set to have another style.  Actually it's all up to your creation!!

So here's the basic plain donut recipe that I'm sharing with you:

Ingredients (recipe makes about 20 donuts - depending on size you make):
100g Soft Butter (Butter thaw 1 hour from fridge)
60g Sugar
30g Milk Powder (can omit if you don't like milk taste but actually it's nice to add it)
1 Egg
1/2 tsp Salt
15g Instant Yeast
200ml Water
350g Bread Flour (also known as High Protein Flour)
150g Plain Flour


Grease some baking trays in advance first.
    Add all ingredients in mixer bowl (except the 2 flours) and beat with dough hook at medium speed for about 5 minutes.


    Turn to slow speed and add in the 2 types of flours to mix slowly and after mixing well, turn to medium speed to beat into a smooth shiny dough (about 10 minutes).

    Leave dough in a bowl and cover it to let it rest for 40 minutes. (DO NOT EXCEED this timing).


    Cut dough into small portion of about 50g each and roll into round balls and leave it on greased tray to let it proof for 10 minutes. (Leave wide apart as it will expand)


    Flatten dough and cut a hole in the center with a cutter and leave dough aside to let it proof for another 1 hour till double in size.

    The small dough ball that you cut out can be eaten too..so let it proof till double in size too.


    Heat wok with lots of oil till hot and then add in the dough to deep fry with medium fire till golden brown on one side then turn over the donut to fry the other side (do not keep turning the donut ok!).


    Coat fried donut with caster sugar when cooled (not when it's hot or else sugar will melt)


    Hope you have time to try making own donut to share with friends and family members one day!

    Wednesday, July 14, 2010

    Banana Muffins

    What will you do to over ripe bananas?  I don't like to eat them if they are too ripe!
    Besides being too soft to eat, you will also see irritating fruit flies around them too.

    Some might say can keep bananas in the fridge.  I noticed that all fruits can be kept in the fridge and usually I like to eat fruits that's cold.  However definitely NOT bananas...I find it strange eating them cold.

    I think the best way is to make it into muffins!!

    Ingredients:
    260g Ripe Banana
    280g Sugar
    3 Eggs
    100g Sour Cream
    120ml Corn Oil
    100ml Milk
    1/2 tsp Banana Essence (optional)
    320g Self-Raising Flour (Sieve)
    60g Walnut (toast at 160 degree for 10 minutes first and then chop it coarsely)
    60g Macadamia Nuts (toast at 160 degree for 10 minutes first and then chop it coarsely)

    • Preheat oven at 200 degree.
    • Place bananas in mixer bowl and add in the sugar then whisk at medium speed till well mixed.
    • Add in eggs to mix well then pour in the sour cream and continue to whisk for 1 to 2 minutes.
    • Pour in corn oil and milk to mixer bowl and add few drops of banana essence (if like) and continue whisking.
    • Turn mixer to slow speed and add in the flour and nuts and continue to mix till well done (don't over mix).
    • Scoop batter into muffin cup and bake 20 to 25 minutes till golden brown.
    I like to eat hot moist banana muffins!!  Yum Yum

    Tuesday, July 13, 2010

    Something brainy...Walnut Cookies

    I heard walnut is good for the brain.  Do you believe so?

    Many old folks believed that pig brain is also good for our brain.  You dare to eat?  Ha..definitely not me!  And I'm not sharing any pig brain soup recipe here...

    I fine that our brain is a very special organ.  How can such a small piece of "toufu" store things like a memory card huh?

    Anyway, I like to share with you this walnut recipe and let's hope by eating it, it will aid in boosting our brain cells ha!

    Ingredients (recipe makes about 120 pieces of cookies):

    300g Top Four (sieve)
    150g Walnut (bake at 160 degree for 10 minutes, cool and blend to coarse powder)
    100g Walnut (raw - don't bake)
    1/2 tsp Salt
    1/2 tsp Bicarbonate Soda
    2 tsp Baking Powder
    180g Icing Sugar
    120g Butter
    120g Shortening
    1/2 tsp Vanilla Powder
    2 Egg Yolks

    For Glazing - 1 Egg + 1/8 tsp salt (beat lightly and sieve)

    • Put Top Flour, salt, bicarbonate soda, baking powder and blended walnut powder in a bowl and mix together then leave aside.
    • Sieve icing sugar into the mixer bowl and add in 120g butter and shortening, vanilla powder and 2 egg yolks into mixer bowl.  Beat it for 2 minutes (1st minute slow and then change to fast speed).
    • Add in the flour mixture bit by bit into the mixer bowl and continue to beat with slow speed till all flour has been added in and well mixed (do not mixed too long).
    • Grease few baking tins with oil and preheat oven at 180 degree.

    • Roll dough into small equal size balls and put a piece of raw walnut on top and press lightly.  Leave enough gap in-between dough because cookie will expand when baking.
    • Egg wash cookies and bake at 180 degree for 10 minutes and then remove tray to do 2nd round of egg wash and then bake till golden and remove to cool before storing.
     Here's your nice walnut cookies!  Enjoy!!

    Sawadee Kaa...Chan Gin Tom Yam Goong Kaa

    Ha ha ha....you must be wondering what is this all about right?
    Direct translation = Hello, I'm eating Tom Yam Prawn Soup

    I first learned to cook Tom Yam Soup from a Thai Taxi Driver's wife in Bangkok few years back.  He heard we looking for places to fish (we went to Bangkok for fishing) so brought us back to his village.  He said there's a place with lots of fishes so we decided to explore.  I got a shock at his so-called fishing place...it's actually just a drain that the villages dig that link to a nearby river!  Knowing that it's definitely a waste of time to fish there, I uses sign language to tell him that I'm interested to learn Thai cooking.  Once they understood my intention, His wife took me to their local wet market in a bike to get ingredients to cook some simple home cooked Thai dishes.  I saw crabs at the market and decided to show off our famous chilli crab to them so also brought all the necessary ingredients I can find there (seems like a cooking exchange program that day).  We seated on the wooden planks floor of a high-rise wooden kampong house and enjoyed a wonderful dinner.

    Recently, my guy have been busying learning to speak Thai so I also take the chance to go learn some Thai dishes too ha!  Besides the one time eventful chance of going to the Thai Taxi Driver house, we get to know another Thai friend (our fishing kaki) and since then we kept in touch occasionally and we sure meet up whenever we go to Thailand.


    I think it's good that my guy impressed them with his Thai language and I hope next time when I go Bangkok, I can impress them with my Thai cooking skills hee.

    Today let's learn the signature dish....Tom Yam Goong!

    Ingredients (recipe serves 4 pax):
    1000ml Water
    250ml Evaporated Milk
    8 Slices Galangal
    Kaffir Lime Leave (Remove the stem)
    3 Stalks Lemongrass (cut into 2 pieces every stalk and flatten with chopper)
    500g Medium Grey Prawns
    100g Oyster Mushroom
    100g Baby Corn
    15 Bird Eye's Chilli (put it in a plastic bag and use your knife to smash it)
    3 Bunch of Coriander Leaves (Cut into 1 cm length)
    3 Coriander Root (cut from the Coriander Leaves, scrap clean and flatten with chopper)
    5 Garlic (remove skin and smash it)
    5 Shallots (remove skin and smash it)
    2 Chicken Cubes
    3 tbsp Lime Juice from Green Lime
    2 tbsp Fish Sauce
    3 tbsp Chilli Paste (buy Tom Yam Paste Chilli from Supermarket - too troublesome to teach you to cook the Chilli on your own and you will have very oily kitchen after frying the chilli so let's cook smart!!)

    • Boil water and add in chicken cubes, galangal, kaffir lime leaves, coriander roots, lemongrass, garlic and shallots for 10 minutes.
    • Add in the chilli paste and simmer for another 5 minutes.
    • Add in the Baby Corn, Abalone Mushroom and prawns and boil for another 2 minutes.
    • Pour in the Evaporated milk and add in the Bird Eye's Chilli and cook for another minute.
    • Turn off the fire and add in fish sauce and lime juice.
    • Serve and garnish with Coriander leaves before serving.
    Done!!  Tasty and spicy Tom Yam Goong is ready to be served.


    Sunday, July 11, 2010

    Healthy Korean Toufu Soup (Soodubu Chigae)

    Ho ho...my favorite cuisine time again...I invented this healthy version Korean Toufu Chigae on last Friday night!  Those on diet can try...again this is very low in calories!!!

    Ingredients (Recipe serves 2 - 3 pax):
    3 Dried Mushroom
    15 Anchovies
    50g Abalone Mushroom
    10 Fish Balls
    1 pack Toufu
    1 pack Needle Mushroom
    10 slices of lean meat
    1 Garlic (slice)
    1 Stalk Spring Onion (Dice)
    1 tbsp Korean Hot Pepper Flakes
    1 tbsp Fish Sauce
    1 tsp Sesame Oil
    1 Onion (slice thin)
    700 ml water


    Boil water in earthen pot (or normal pot if you don't have any earthen pot).  Add in anchovies, slice garlic, slice onion and dried mushroom in to make soup base.  Boil for 15 minutes in low to med fire.


    While boiling the soup base, wash and cut all the other ingredients first.

    Once the soup base is ready, strain and put the soup back to the pot and remove the rest of the ingredients.  However, keep the dried mushroom OK.  Slice it and put back to the soup base.


    Add in the hot pepper flakes stir well and add in the pork, fish balls, abalone mushroom to boil for about 5 to 7 minutes.


    Lastly add in the seasoning and toufu and boil for another 5 more minutes.

    Sprinkle spring onions on top and serve!!

    It's very appetizing and guilt free!  Who says dieting got to be boring??

    Fruity Fruit Cake

    I just brought a new mixer last night so I decide to give it a first try by making an easy to bake fruit cake!  My hubby gave me just 89 marks...hmm...he's very stingy ha ha....89 marks but he ate a few pieces at one go!!!!

    Well, you can try making and judge how's the taste!

    Ingredients (makes a 9 inches square cake):

    Part A
    250g Hard Butter (Direct from fridge and cut into few pieces for easy beating)
    150g Sugar
    5 Egg Yolks
    250g Plain Flour             } Sieve together
    1 tsp Baking Powder       }
    250g Mixed Dried Fruits (optional to soak with 50ml hard liquor or rum for 1 to 2 days)
    1 tbsp Rum (add this if you didn't soak dried fruits with liquor or rum ahead of time)

    Part B
    5 Egg Whites
    50g Sugar
    1/8 tsp Cream of Tartar
    • Preheat oven to 160 degree.  Grease and line a 9 inches square or round baking tin with paper.
    • Cream Part A - butter and sugar together with slow speed first for 1 minute then turn to medium speed (speed 3 for Kenwood mixer) and cream for 15 minutes or until fluffy.
    • Turn speed to slow and add in egg yolks (and rum) and mix well for another 2 to 3 minutes with medium speed.
    • Add mixed dried fruits into the sieved flours (to separate them so that they don't stick in a lump)
    • Add in the flour cum dried fruits into mixer and cream with slow speed till well mixed (don't over mix).  Remove and transfer it into a big mixing bowl. 
    • Wash mixer bowl clean and dry it.  Pour in Part B (egg whites, sugar and cream of tartar) and use egg whisk and whisked at maximum speed until stiff.
    • Add egg white mixture into butter mixture and mix well until all is well combine (with hand whisk).
    • Pour batter into baking tin and bang it before bake.
    • Bake cake for 50 minutes to 1 hour.  (test with knife in center to make sure it's clean means it's fully baked).  Should you find the top colour is already quite brown before timing, cover with a greased paper or aluminum foil so that the top won't be burnt!

    Enjoy your baking!!

    Healthy Dumplings (Jiao Zi)

    I had very bad gastric problem recently and have been seeing specialist and still no solution yet.  Since then I've been trying to eat more healthy (less oil, less meat, less fried food, no coconut, less spicy food as well).

    However today I have urge to eat dumplings so in order to balance it out, I decided to make healthy dumplings myself instead!  Less meat, more veggie and mushroom...

    Here's my recipe for healthy Dumplings (makes about 30 to 35 dumplings):


    300g Minced Pork (tell the pork seller to mince from totally lean meat with 0 fats!)
    300g Dice Mushroom
    300g Dice Spring Onion + Chinese Parsley
    300g Dice Carrot
    1 Onion dice
    1 tbsp Corn flour
    1 tsp Sesame Oil
    1 tsp Pepper
    1 tbsp Fish Sauce
    1 tsp Light Soy Sauce
    1 pack of ready to wrap dumpling skin from supermarket (make sure it's those for dumplings not wanton)


    Just mixed all ingredients and seasoning together and leave it in fridge for 30 minutes.

    To wrap, prepare a bowl of water.  Wet the dumpling skin with water to make design you like and scoop a spoonful of ingredients  onto the skin and wrap it up!


    Now after wrapping up all the dumplings, you can choose to deep fried it (no no if you are on diet ha ha) or steam it.  I choose to simmer in water+ a bit of oil in wok instead (because I'm lazy to bring out my steamer ha ha)

    It takes about 5 to 7 minutes to cook and my healthy dumplings are cooked!  Eat with black vinegar + shredded ginger is the best!!  Have fun wrapping!!

    Saturday, July 10, 2010

    Terrific Baked Potato Cake

    Today is a boring Saturday for me.  Did nothing but wrapped some dumplings and steam it for my lunch.  Went to buy a new mixer (finally can start to bake my cakes, cookies and buns again!)

    Since I have my new mixer again, I will share with you today on how to bake a nice potato cake.  This is different from the usual butter or cream cake.

    WOW..was the first impression I had in mind when I first tasted this bake potato cake.  It smells wonderful and it's very tasty.  Not difficult to do but make just need to make sure you test different areas of the cake to make sure it's fully baked before removing from oven,

    Ingredients (recipe makes a 7 inch square tin cake):
    1 kg USA Potato (peel, slice thick and steam for 40 minutes.  Mash it while hot and leave aside)
    250g Sugar
    150g Wheat Flour (Deng Flour)
    150g Soft Butter (thaw in room temperature for 45 minutes from fridge)
    5 Egg Yolks (lightly beaten and add 1 tsp vanilla essence in it)
    3 Egg Whites
    * 1 egg for bushing (lightly beat and sieve it)
    •  Preheat oven at 180 degree.
    • Beat sugar and butter together for 5 minutes with maximum speed.
    • Add in egg whites slowly while still mixing and continue to blend 3 more minutes.
    • Thereafter slowly add in egg yolk and continue to beat till well mixed.
    • Add in mashed potatoes and mix well.
    • Turn mixer to slow speed and then add in wheat flour slowly to mix well (don't beat too long for this process).
    • Grease and line 7" square tin.
    • Pour mixture to tin and bake for 10 minutes then remove and apply egg wash.  Continue egg wash process after baking every 10 minutes (total 3 times = 30 mins)
    • Bake for another 15 minutes (or till cooked) after 3rd egg wash.  If skin is turning very golden before cake is fully cooked, cover the cake tin with aluminium foil and continue to bake till done.  The foil will help to prevent the top from burning and yet can continue to bake the cake till cooked. (prick with skin or stick on different areas of the cake to make sure it's cooked.)
    Transfer cake to wire rack to cool after baked.  Cut only after it has cool down completely or just slightly warm.

    Mashigeta..(means Delicious in Korean)  Enjoy!

    Friday, July 9, 2010

    Melt In The Mouth - Almond Cookies

    Sesame Street's Cookie Monster is here!!!

     I love cookies...especially home-baked.  Today I will share with you my Almond Cookies Recipe.  This cookie is easy to bake, nice to eat and you can even bake it and give to friends and relatives during Chinese New Year period too!

    It is always a fun thing whenever I do baking!  I like to see the satisfied look from family and friends when they tasted my cookies or cakes or dishes.  I think that's what every "cook" love to see!

    Tomorrow is Saturday, if you have the time try baking some since the ingredients are easy to find.


    Ingredients (Recipe makes about 120 pieces):
    300g Ground Almond
    300g Plain Flour (Sieve)
    100g Icing Sugar (Sieve)
    1/2 tsp Salt
    150g Shortening
    * You will need to get cookie mould (any shape or design you like)

    • Preheat oven at 150 degree for 15 minutes.
    • Spread ground almond on baking tray and bake for 25 minutes (mix every 5 to 10 minutes to prevent over burning).  Leave to cool completely.
    • Turn oven temperature to 180 degree now.
    • Put plain flour, icing sugar, cooled almond powder into mixer bowl and mix well with hand.
    • Add in shortening and mix softly with hand using rubbing in method (do not press, just rub gently).  Grab a handful and press it to see if it holds (If don't, slowly add in 1 tbsp water to mix and try again...repeat method till mixture can hold).
    • Grease 3 baking tin and dust some flour on the surface of the tin.
    • Fill the cookie mould with almond powder mixture and press it till it's even on the surface and tight.  Knock out the biscuit (you got to try a few round to get the right strength when knocking out the cookies) and place it onto the tray (don't need to leave big gap between cookies because it won't expand).
    • Once the whole tray is filled with almond cookies, bake it for 15 to 20 minutes till light golden colour and remove to cool. 
    This cookies melts in the mouth so its very soft and fragile.  Handle it lightly when storing into air-tight jar.

    That's it!  Easy right?

    Thursday, July 8, 2010

    Yummy Egg Tarts

    I noticed that seldom got people don't eat eggs hee..
    I like eggs but don't like to eat egg tarts.  I remembered I ate my 1st egg tarts when I was about 15 years old (given to me by a friend...and oh...that's soooo long ago!) and I don't quite like the taste because it's cold!  To me eggs should be hot and when it's cold, I felt it's smelly.  Crazy right?

    Then as years goes by, there's Portuguese egg tarts and those fluffy crust egg tarts in the market too but still I don't quite like to eat them.

    2 Years ago I learned this egg tart from a teacher and it's the best I have eaten so far.  Although the pastry is not those fluffy type but it's very fragrant.  I could eat 6 egg tarts in one go after baking (while it's still warm).  I have baked a couple of times and bring to party and gathering and all the children and adults loved it.

    Egg Tarts Ingredients (recipe makes about 30 to 35 tarts):

    100ml water + 125g sugar (boil till sugar dissolved and leave to cool) - This is the syrup and need to do first before preparing to do the rest of the steps.

    400g Top Flour
    20g Milk Powder
    20g Custard Powder
    (Sieve all the above 3 powders together)

    125g Semi Hard Butter
    125g Margarine
    100g Icing Sugar (sieve)
    7 Eggs
    1/2 tsp Vanilla Essence
    1 Fresh Lime (extract the juice)
    200ml Fresh Milk or Carnation Milk (I like to use fresh milk)

    • Preheat Oven to 180 degree.
    • Put butter, margarine and icing sugar in mixer bowl and beat it for 5 minutes in normal speed (speed 1 to 2 for Kenwood Mixer).
    • Add in 1 egg and vanilla essence and beat at high speed for 2 minutes and then reduce to slow speed and add in sieved flours bit by bit into the bowl to mix.  Turn to high speed and beat 1 minute after adding all the flours.
    • Remove dough and rest it for 10 minutes (cover the dough to prevent dryness).
    • If your tart mould is new, you got to grease it with cooking oil.  If not, then can skip this step.
    • After resting the dough, remove and roll it into long roll and divide dough into smaller ball of about 25g each.
    • Roll dough into ball and press it inside the mould and leave edge a bit higher then mould and prick lightly on the tart base with a fork (do not prick through the dough or else tart will stick to the mould when baked)

    • Bake the tarts in 180 degree for 8 minutes (Half bake the tart base first) then remove from oven to cool.
    • Crack 6 eggs in a bowl and mix it with hand mixer lightly and add in the cooled syrup water and the fresh milk and mix well. (Turn the oven temperature to 170 degree now)
    • Sieve the egg mixture twice and add in the lime juice and mix well lightly.  (Optional to add a drop of "Egg Yolk Yellow" colouring if you want a brighter yellow colouring.
    • Pour egg mixture into cooled tart base to 90% filled and place it into oven and bake at 170 degree for 12 to 15 minutes (depending on your type of oven, best to see the egg texture to determine if tart is fully baked.  Do not over bake).  Got to make sure when place tart into oven, do it lightly, don't let the egg mixture flow out from the tart or else it will cost the tart to stick to the mould.
    • If your oven is small and can't bake all tarts at one time, put the egg mixture in fridge before using.

    • Remove tarts from oven and cool it for 5 minutes and try to remove tart from mould to paper holder (beware mould still hot!).  Serve it warm is the best!!

    Wednesday, July 7, 2010

    Under the Sea....Sweet & Sour Prawns

    Seafood is so good if it's fresh!  I love seafood..especially crabs!!  Because I love to eat seafood, I pick up fishing as one of my hobby too!!  I'm one tough female angler...my record catch was a Thai Mekong Catfish fetching around 25 kg !!


    I've ever followed sea gypsy out to experience their daily life!  Believe it or not...it's tough and they earn so little to feed a family of 8 to 10.  My legs were buried deep in the mud (but those are not dead sea mud) when we goes to catch mud crabs.  My 10 fingers were all poked with holes by the jumping prawns stuck on fishing net when we were racing with time to remove them from the net during low tide hours.  These experiences will never be forgotten by me!  I don't think many people will have the chance to do that.

    OK let's get back to the cooking part!  Today I will share one quick and easy recipe with  you. 

    Sweet & Sour Prawns

    Ingredients (serve 4 pax):
    500g Prawns (Grey Prawns preferred)
    30g Minced Garlic
    30g Minced Ginger
    30g Minced Shallots
    1 Red Chilli (remove seeds and dice finely)
    2 stalks Spring Onion (dice)
    2 Lime (squeeze out the juice to use)
    1 tbsp Hua Tiao or Cooking Wine

    Seasoning (mixed all together):
    2 tbsp Thai Chilli Sauce, 1 tbsp Tomato Sauce, 2 tbsp Maggie Chilli Sauce, 1 tbsp Plum Sauce, 1/2 tsp White Pepper, 1/2 tbsp Sugar, 6 tbsp Water

    Coating:
    2 tbsp Corn Flour

    • Wash prawns, drip dry and trim head, legs and remove vein (keep the shell).
    • Add in corn flour and mix well.
    • Heat wok with about 10 tbsp oil and deep fry the prawns for about 45 seconds will do.  Remove and drain.
    • Heat wok with 2 tbsp oil again and add in ginger to stir fry few seconds then add in the shallot and stir fry till fragrant.
    • Now add in the garlic and dice chilli and stir well.
    • Add in 1/2 portion of spring onions first and then add in the fried prawns and stir fry well.  Add in the Hua Tiao or Cooking Wine now and stir well.
    • Pour in the seasoning and cook till water almost dry up in the wok.
    • Turn off fire and add in the lime juice.  Sprinkle balance dice spring onions on top and serve.

    See, it's easy so I hope you can try it on your own!